| The Unofficial Samba HOWTO | ||
|---|---|---|
| Prev | Next | |
"If you ever want to have a lot of fun, I recommend that you go off and program an imbedded system. The salient characteristic of an imbedded system is that it cannot be allowed to get into a state from which only direct intervention will suffice to remove it. An imbedded system can't permanently trust anything it hears from the outside world. It must sniff around, adapt, consider, sniff around, and adapt again. I'm not talking about ordinary modular programming carefulness here. No. Programming an imbedded system calls for undiluted raging maniacal paranoia. For example, our ethernet front ends need to know what network number they are on so that they can address and route PUPs properly. How do you find out what your network number is? Easy, you ask a gateway. Gateways are required by definition to know their correct network numbers. Once you've got your network number, you start using it and before you can blink you've got it wired into fifteen different sockets spread all over creation. Now what happens when the panic-stricken operator realizes he was running the wrong version of the gateway which was giving out the wrong network number? Never supposed to happen. Tough. Supposing that your software discovers that the gateway is now giving out a different network number than before, what's it supposed to do about it? This is not discussed in the protocol document. Never supposed to happen. Tough. I think you get my drift."
Regardless of the client operating system you use, you'll need to set up a list of valid username/passwords pairs that are allowed to access the Samba server. Much like the passwd(1) command changes a password in the system's passwd(5) database, the smbpasswd(8) command changes the smbpasswd(5) database. It's strongly recommended that you know where these files are located (to prevent headaches later on if duplicate versions of Samba ever get/were installed on the machine). To do this, we need to figure out where our two smbpasswd files exists. As root, run the first command (with the other lines being the output):
# find / -name smbpasswd -exec ls -Fla {} \;
-rw-------    1 root     root         1160 2004-02-08 12:23 /etc/samba/private/smbpasswd
-rwxr-xr-x    1 root     root       768080 2004-02-09 09:19 /usr/bin/smbpasswd*
The first one is your smbpasswd(5) database (note the 600 permissions) and the second is your smbpasswd(8) command (note the 755 permissions). If you have more than these two, then you have more than one version of Samba installed on your machine, and you have an even bigger problem on your hands to deal with first! If you just installed Samba and you find that you don't have a smbpasswd(5) database yet, don't panic; this is normal.
To add a user, as root run:
# smbpasswd -a username
You'll be prompted for a password, and the user will be added (-a) to the database.
While Samba relies on its own database to determine user/password pairs, it relies on the system's group(5) database for determining group membership(s). If you plan on using groups to allow/deny access to certain files or shares on your Samba server, you'll have to first make sure you've added the user(s) to your smbpasswd(5) database. Then, simply add them to your system's group(5) database using the vigr(8) command. For example:
# vigr
This will allow you to edit the /etc/group database file. You can create new groups as needed. For ease of administration, it's recommended that you create a single group that contains a list of all your Samba users and then create unique groups. For example:
smbusers::1000:fred,sally,sam,ken
accounting::1001:fred,sally
benefits::1002:sam,ken
Note that this won't take effect until any users added to the group file log out and back in to reestablish their group memberships!
The use of domains basically boils down to three recommendations:
If you plan on using Windows 95, you need to be aware that it is not able to use encrypted passwords and, without adjusting Samba, will be unable to talk with it. Of course, the reverse is true: Tell Samba to use unencrypted passwords, and all your non-Windows 95 clients will not be able to connect.
To disable encrypted passwords with Samba, make the following change to your smb.conf file:
[global]
	encrypt passwords = no
To finish configuring your Windows 95 machine, follow the instructions in the next section for Windows 98/ME.
Fortunately, both Windows 98 and Windows ME use encrypted passwords by default. All that's left is to configure your Network properties in the Control Panel. Make sure you have Client for Microsoft Networks and TCP/IP installed along with your network adapter. If you're not using a DHCP server, you'll probably need to configure the TCP/IP settings as well.
Under the properties for Client for Microsoft Networks, check the box for Log on to Windows NT domain and specify the domain name that your Samba server is using:
Finally, under the second tab labeled Identification, give your computer a unique name and specify the name of the workgroup (which should match the name of the domain, although not strictly necessary):
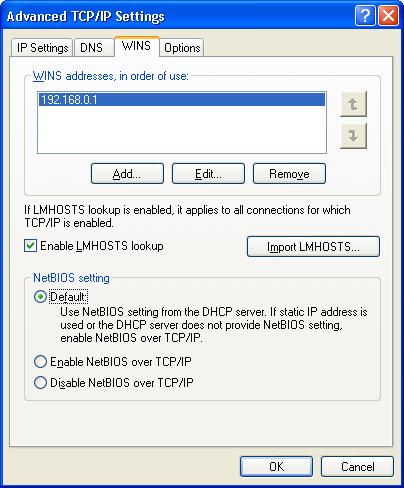
You'll need to enable TCP/IP on your system, as well as configure a WINS server, from the control panel. The IP address of the WINS server should be your Samba server (where the nmbd daemon is running):
To map a drive using the Windows GUI, open My Computer. On the toolbar are many options; look for one that provides a list that includes the phrase Map Network Drive (under Windows XP this option is under the Tools menu). Once selected, a new box will open up. In the Drive box, click a drive letter that you wish to use. In the Folder box, type the path for the server and path that you wish to connect to:
Alternately, from a Command Prompt, you can type:
NET USE P: \\niftyserver\pub /YES
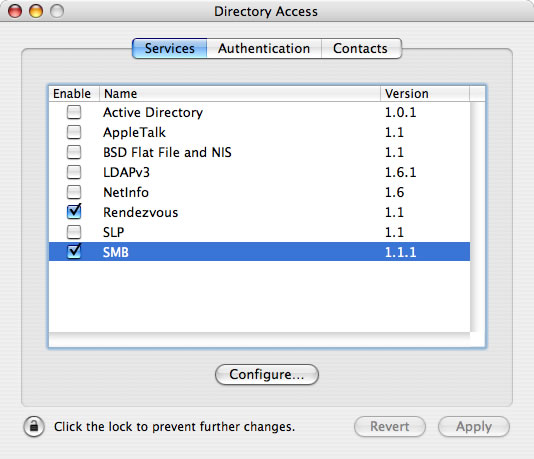
First, make sure that you've enabled SMB support in the Macintosh Directory Access Utility (in the Applications/Utility folder):
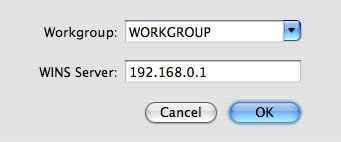
Select SMB and then click Configure. You can now enter in your preferred workgroup and WINS server information:
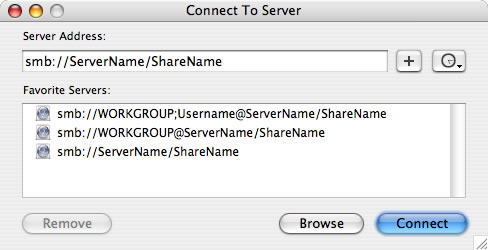
Next, activate the Finder (e.g., click on the Finder in the Dock). Select Go, then Connect to Server. In the Server Address field, type in your server address:
After clicking Connect, you may be prompted for your authentication:
If you're using Mac OS 10.3 or later, you might be interested in investigating the new Network Browsing option. You can find a good discussion of it at http://docs.info.apple.com/article.html?artnum=107804.
If you're just planning on running Samba on your Linux box as a server only, you can skip this section. If, however, you plan to mount other SMB/Samba shares on your Linux box, you'll need to prepare a few things first.
First, you'll want to enable the SMB_FS option in your Linux kernel and recompile (see below). If you're planning on running only English, you can skip the option for setting a default NLS. The CIFS option is in a relatively early development stage and can safely be skipped for now.
Note: If you don't compile SMB or CIFS support into your kernel, you'll receive the error message, "mount: fs type smbfs not supported by kernel" when you attempt to mount the remote filesystem.
Second, you'll also need to install Samba on both machines, even though you won't be running it on one of them. On your second machine, you'll need to configure Samba with the --with-smbmount parameter. Why is this? Usually, your system's mount command requires no additional information about the type of filesystem you are attempting to mount. For a few types however (e.g., NFS, SMB/CIFS), additional code is necessary. Using this option automatically creates the smbmount and smbumount commands along with the file /sbin/mount.smbfs (which is actually just a soft link to smbmount).
Lastly, you'll need to add an entry for your Samba server in your system's /etc/hosts file if there's no entry for it in your organization's DNS zonefile, or alternately just use the server's IP address instead.
Once done, you can simply run:
# mount -t smbfs -o username=davidrl,password=mypass
//192.168.0.1/pub /mnt
| Prev | Home | Next |
| Server Configuration | Advanced Topics |


![[img]](images/mapdrive.jpg)
![[img]](images/samba-mac2.gif)
![[img]](images/smbkernel.jpg)